Part 15 - Assembly - continued
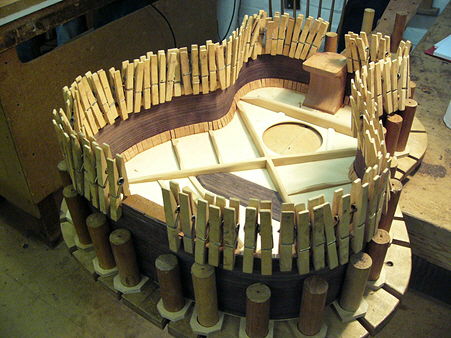
With the sides now sized, I can glue in the linings that will form the sides-to-back join. Here I can used kerfed strips as I’ll be using the go-bar deck to join them together. The linings are glued and held in position using the latest high tech clamping system.
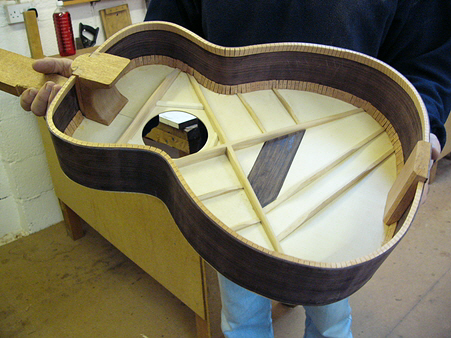
At this point I need to cut the wedges and end-block down to the correct height and do a little work to the heel gluing surface to ensure a nice curve to the back when it is fitted.
Making An Acoustic Guitar - Page 22
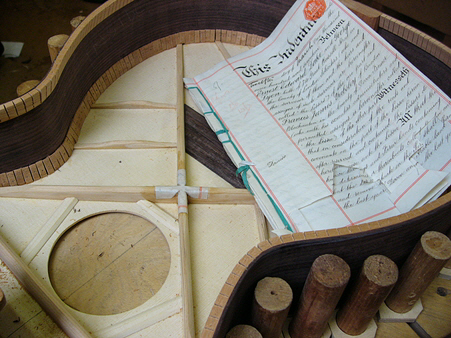
Here’s a nice touch... The final operation before fitting the back is to reinforce the X-Brace at its joint. The traditional way to do this is with parchment (animal skin) and hot animal glue. The school has an old legal document printed on parchment and that’s what we used for my guitar. A small piece is cut to shape and as the glue is applied the parchment becomes soft and pliable and can be easily worked into position. It sets rock hard.
(With apologies to all vegetarian readers....)
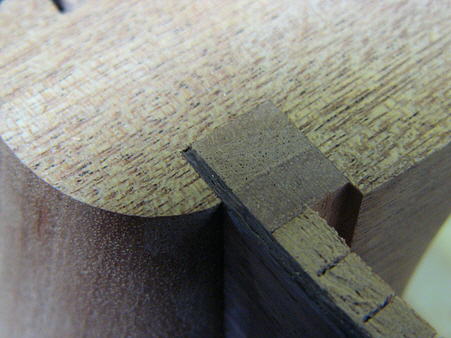
The opposite pic shows the heel-to-side join. I’m quite proud of that - because the side enters the slot at a slight angle none of the corners of the wedge are exactly a right-angle. Add to this the fact that the wedge is, er, wedge-shaped and cutting the wedge wasn’t exactly what you’d call a straight-forward operation.