Apart from a few small jobs - make a truss-rod cover, make a pickguard, fit an end-pin, etc., the final major job is top put some finish on the guitar.
The school uses water-based acrylic lacquer, which performs much like nitro-cellulose but has the major advantage of a much faster curing cycle - important when there’s only a week to get it done.
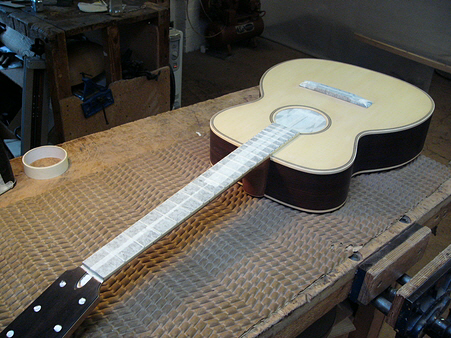
The first job is to ‘raise the grain’. This is done after an initial sanding by applying a very light coat of warm water to the entire guitar. This raises the grain up (it feels furry to the touch) which can then be sanded back again. Failure to do this will cause the grain to rise with the first few coats of lacquer, slowing the job down.
Next job is to seal the rosewood back and sides and mahogany neck with grain filler. After applying a diluted coat of clear shellac to the bindings to seal them against the dyes in the rosewood on goes the mucky stuff. Grain-filling is a messy job - after lovingly sanding your precious guitar down to a mirror finish you slap sticky brown mud all over it. Next day you sand it all off again. Horrible job but essential unless you want your finished instrument to look like a piece of tree bark.
Next I hand applied two more very dilute coats of shellac to the entire guitar as a final sealer before lacquering.
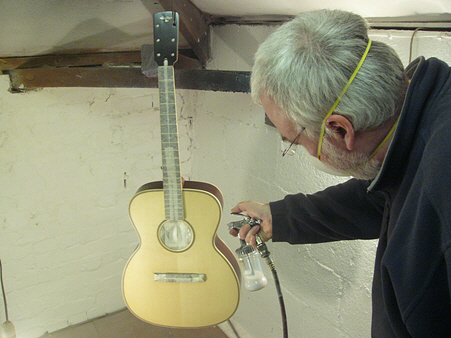
After that it’s masking up the bridge, soundhole and fingerboard and then into the spray booth. I loved this part, the only finishing I’ve done in the past is with aerosols and using a gun - and a DeVilbiss gun too, the Rolls-Royce of spray guns - was a pure delight. Water-based acrylic cures enough for the next coat in about an hour and a half and in three days I was able to give the guitar 17 coats - very light coats, particularly on the front where a thin coat is conducive to good tone.
The guitar received a light sanding between each coat. Then, after a night to cure properly the job of final sanding begins. First the finish is ‘flatted’ - the lacquer is reduced to a dull satin finish all over with 400-grit paper. Then the laborious process of going ‘through the grades’. The school uses ‘Micro-Mesh’ - abrasive sheets developed for the aero-space industry which don’t clog and are far superior to traditional wet-and-dry papers. The next day was spent sanding the whole guitar with successively finer grades - ten in all from 400-grit, all the way to 12000-grit.
It was worth it - the amount of work you put in at this stage is directly proportional to the end result and I’m happy to say that the guitar looks absolutely beautiful. The nicest comment I have received is from a guitar player/collector friend whose opinion I value greatly - he said that if I’d come back from a shopping trip to buy a Martin Triple-O and had come back with this guitar instead he’d have agreed with my choice.
It looks beautiful but more importantly it sounds great too. I told my tutor that I wanted a finger-picker with a bright, balanced tone and the bracing and woods he suggested have worked out fantastically well. It plays and sounds wonderful and everyone who has played it so far hasn’t wanted to put it down.
Check out the finished article on the next page....
Part 22 - Finishing
Making An Acoustic Guitar - Page 32