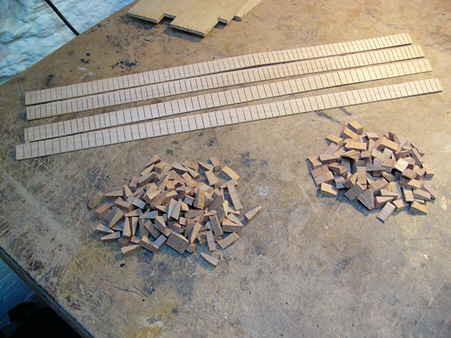
The linings, which I started in the previous stage, need to be finished. Half of them will be kerfed ready for the back-to-sides join, while the others are cut into small ‘tentellone’ wedges which will be individually glued into the top-to-sides join.
Part 15 - Assembly
OK... we’re at the point where all the pieces I’ve been making come together and the guitar starts to take shape (woohoo!)
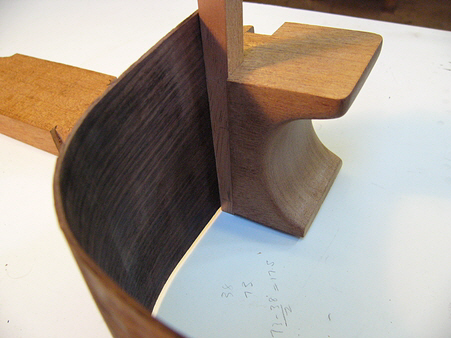
The first job is to fit the wedges which will hold the sides in position in the heel slots. In the pic opposite the heel is shown upside down with the treble side wedge fitted. It is critical that the wedge is a really good fit as this determines how cleanly the side meets the heel (and is one of the things a luthier will look for in a finished guitar). It’s just a matter of trial fit, rework, repeat until it all fits together properly.
Making An Acoustic Guitar - Page 20
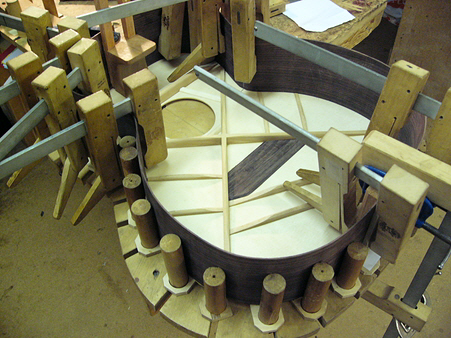
With the wedges ready it’s time to glue the top, sides and neck together. From now on the guitar will be one single piece - unlike one constructed using a dovetail neck/body joint, where neck and body remain separate pieces until the very end of the manufacturing process (a much more efficient way to mass-produce guitars).
Glue is applied to the wedges and the ends of the sides and the wedges are gently hammered home. The end-block is glued and fitted at the same time. Note that no glue is applied between the top and the sides - these will be joined by the linings.