Part 17 - Binding
Making An Acoustic Guitar - Page 25
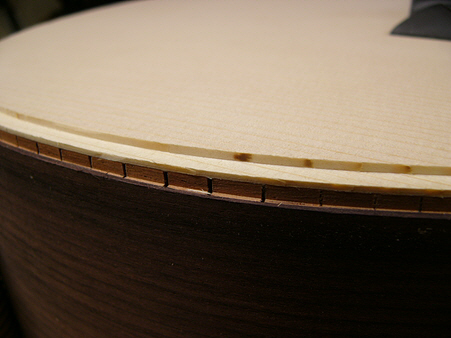
With the guitar in one piece I can now get to work on the bindings and purflings - the strips of material glued into the body edges for extra strength and for decoration. Bindings (corner bindings to be precise) are fitted to routings in the edge of the body, and form part of the structural integrity of the sides-to-front/back joins, while purflings sit in a channel inside the binding and are purely decorative.
For the front I’ll be using the herringbone purfling I used for the soundhole, inside a strip of pale white holly binding, while the back will have holly binding only.
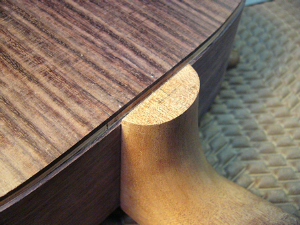
First, I need to create the channels in the edges with the router. The guitar is set up in a jig which holds the top parallel to the bench and the router has a corresponding jig that will hold the cutting bit perpendicular to the edge. I’m routing a 6mm x 1.8mm channel into the bottom edge for the holly and the same in the top plus a 6.5mm x 2mm channel inside this for the herringbone.
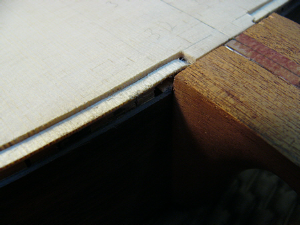
The second picture shows that the top and sides aren’t actually glued to each other and that the join has been routed away - you can see that it’s the linings inside the guitar that are holding it together. The joint will be reinforced by the binding after it is glued into place.

Next, I need to complete the channels, where the router won’t reach, with hand tools. This is a job for tiny chisels and a steady hand.
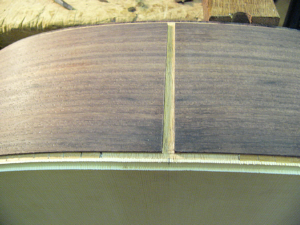
I’ll also cut the channel for the end graft by hand as it’s too fiddly to set the router up for this job. This is done with a scalpel and straight edge. I’ll be gluing a strip of holly in there to match the binding.